
For over 12 years now, our entryway has been an eyesore. Picture piles of shoes, half-practical storage, and very little personality infused into the design. Sure, we’ve tried to fix it up here and there by adding furniture, a rug, lighting, etc, but it always just seemed so lackluster even when we were finished with each project.
And, then we decided to take on our biggest entryway project yet by extending the ceiling. For 9 months now, our porch and entryway has looked exactly as you imagine a construction zone would look if people were also living in it. And, the worst part was that we didn’t even know what our plan was for the entryway when the construction was all finished.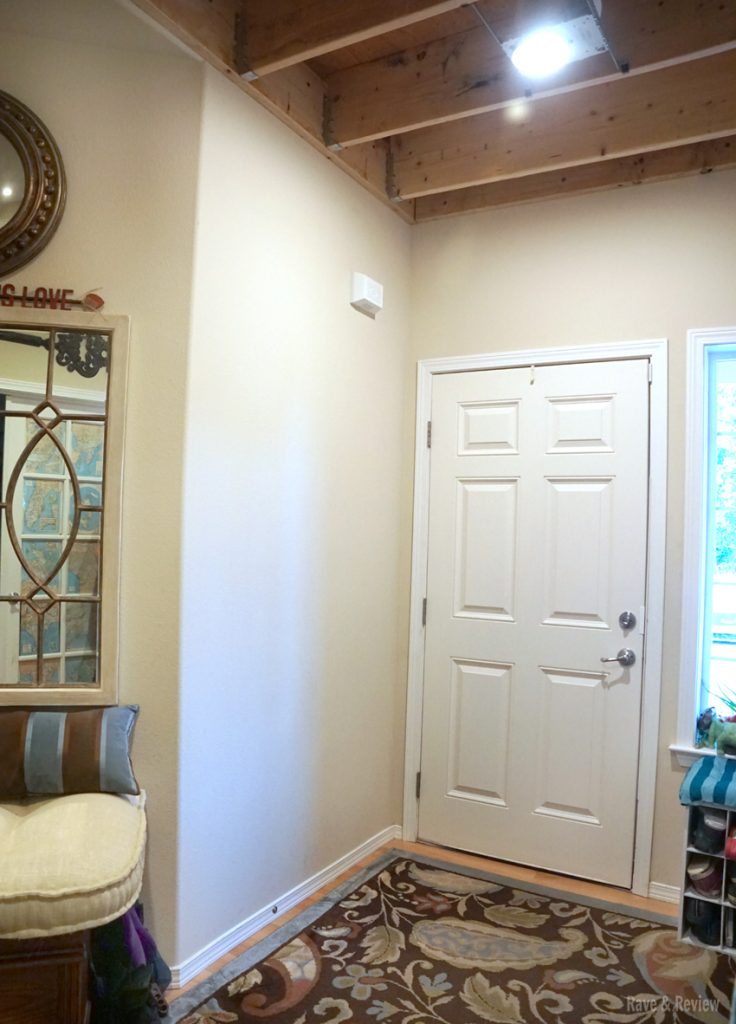
We talked about adding wainscotting to the large open wall behind the door, or creating a beadboard wall with hooks, or simply adding trim and painting the wall white for a faux finish. But, every time we would play around with an idea, one of us would change our minds. So, there the entryway sat – cluttered, impractical, and covered in construction sawdust.
That was before we heard about mywoodwall.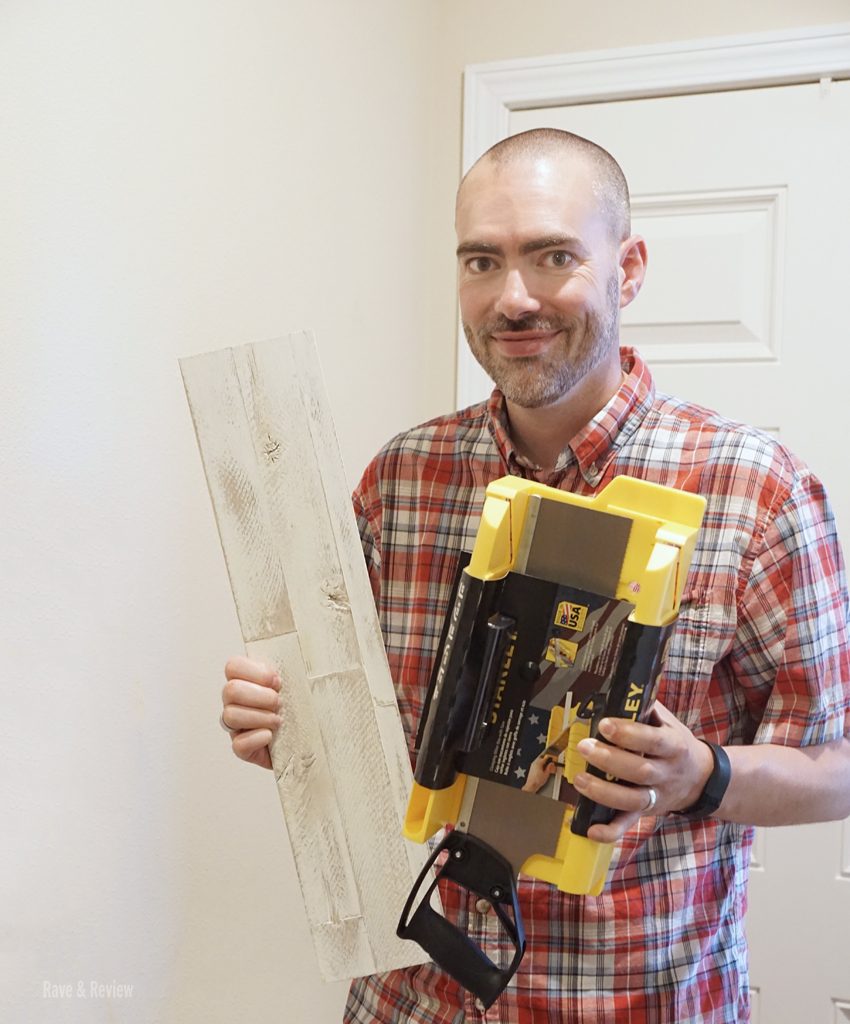
What is mywoodwall?
Mywoodwall is just about the coolest thing a casual DIYer like myself could imagine. They create beautiful, durable, easy to apply and 100% sustainably sourced wood panels that you can use to quickly transform just about any space. From decorative wall art to a fun way to embrace modern design, mywoodwall is real wood wall paneling that you can literally do in an afternoon.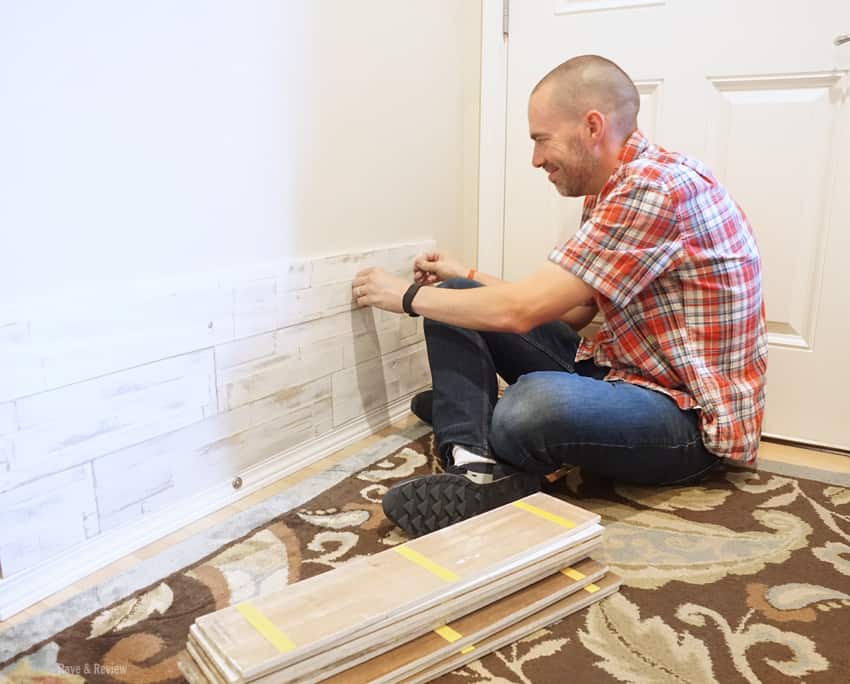 The paneling comes in multiple colors, and I love that you can order a sample pack from the company so you can see the colors for yourself in your own space. We went with the Brushed Coral mywoodwall panels, but there are other more colorful options if you are looking for a bigger focal point in your room.
How to use mywoodwall
It really couldn’t be any easier to use mywoodwall wood paneling. You just ‘Peel and Press’ to create a feature wall or add highlights on any bare surface. Each panel comes with three strips of adhesive already applied to the back of each piece, you just peel the backing and stick it to your wall, cabinet, door, or whatever.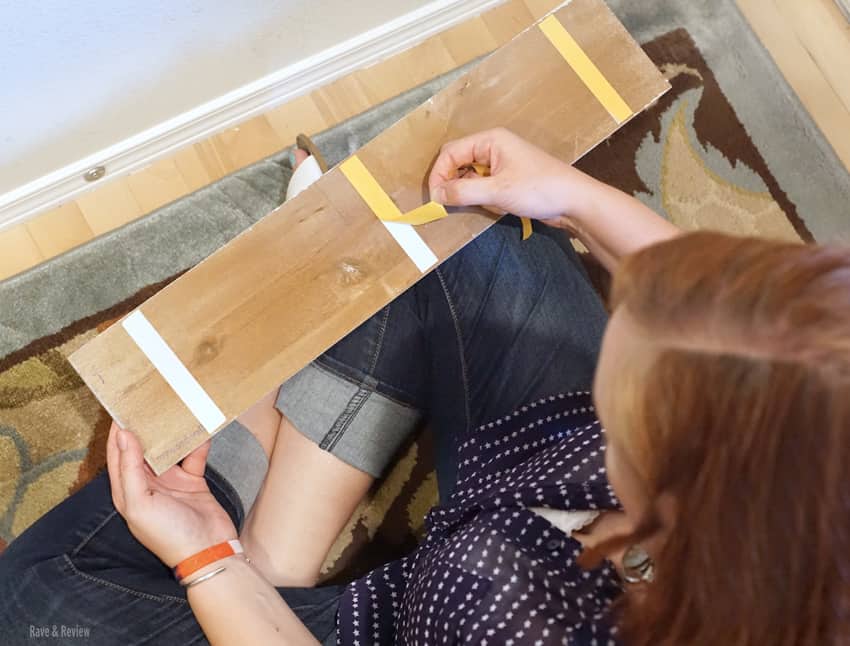 As you design your space and lay out your panels, you may find that you need to trim certain pieces. Simply cut any panels that need to be trimmed with a basic saw {we used an inexpensive miter box}, and then add extra adhesive strips if necessary. This super easy DIY system is a fraction of the cost of hiring a contractor to install a wood wall and virtually eliminates installation costs. The best part is that it can be done by anyone that can cut a board to length!
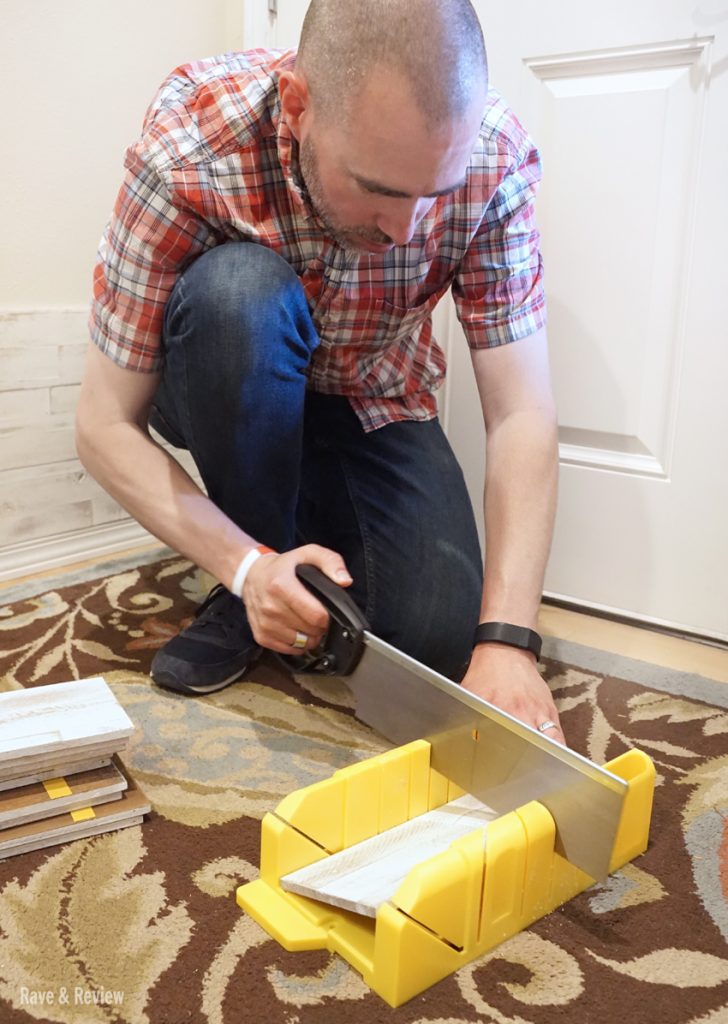
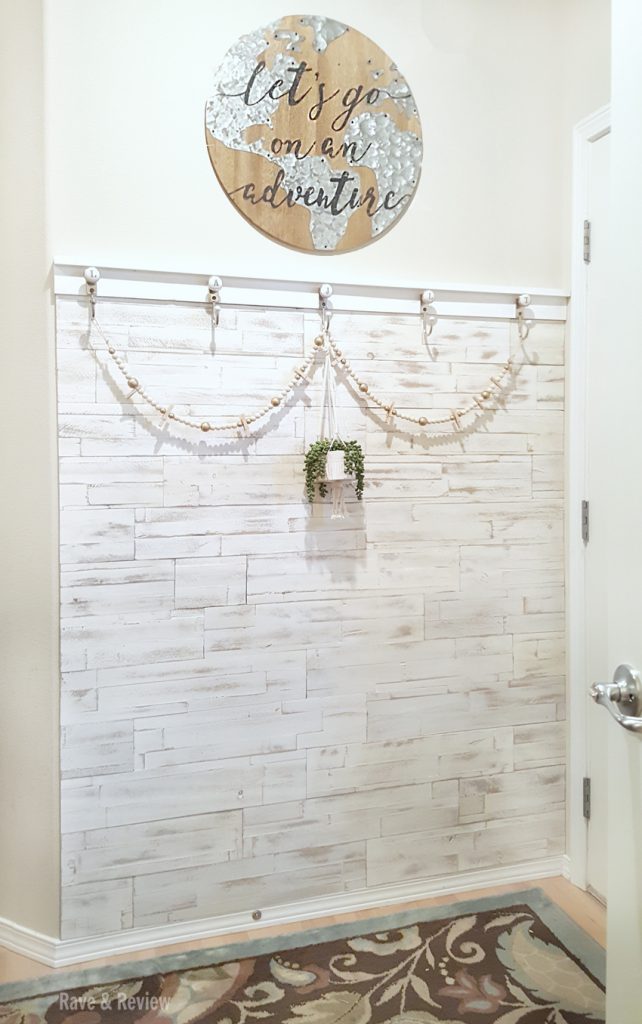
Our entryway sat bare for almost 12 years, and then in less than two hours during nap time, we had a beautiful wood wall with simple trim. After painting and filling the nail holes, we had a gorgeous conversation piece that really adds to the charm of the entryway, and the payoff was almost immediate.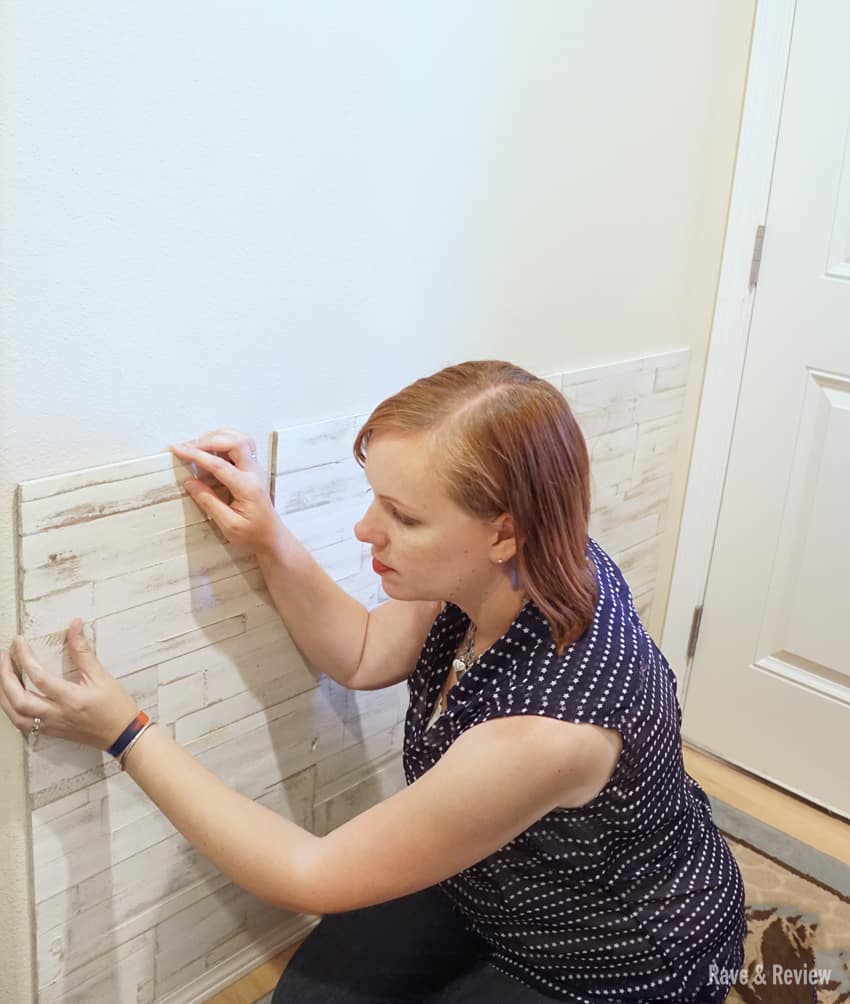
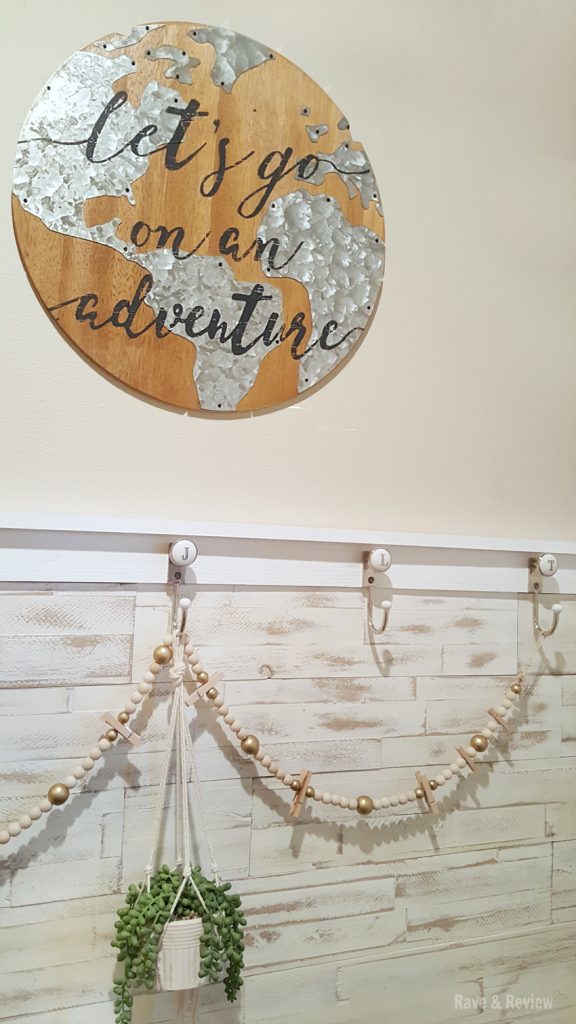
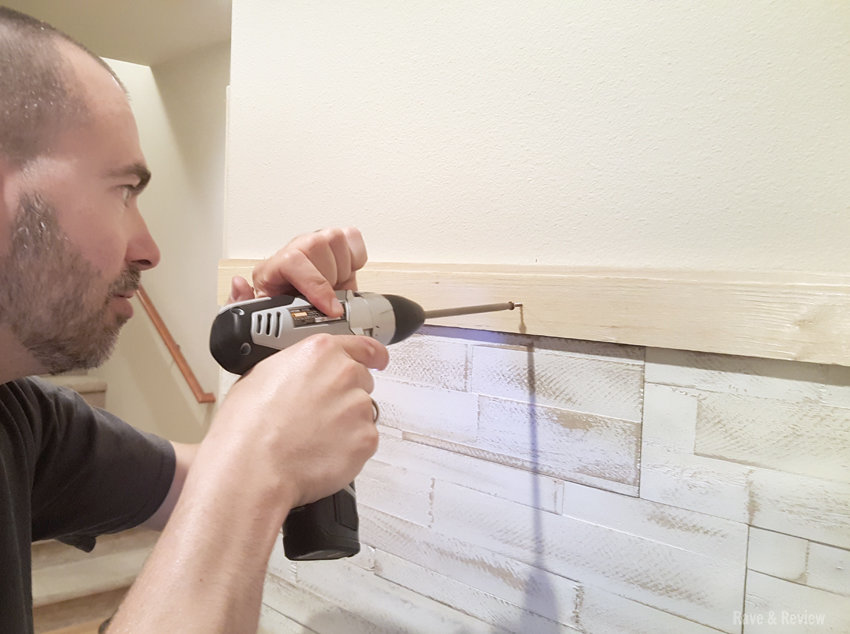 Over the last few weeks, we made the fixture even more practical by adding subway hooks for hanging small items. After that, we added a fun sign to the top, wood beading and a fun little plant to complete the look. We are going to add the same panels to the shoe stacker on the other side of the entry to tie in the space, and then we’re going to start our next mywoodwall project.
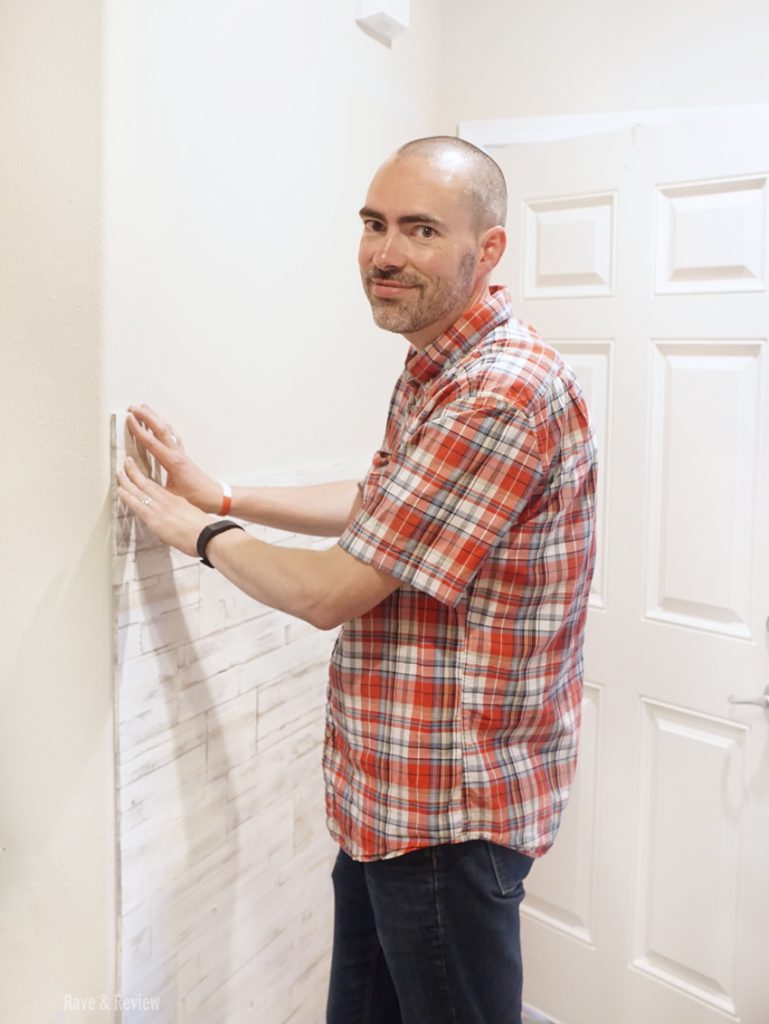 I love our entryway now and everyone that comes over wants to know the secret of the mywoodwall paneling. I’ve had so many friends researching the panels for their own projects since our wall was complete, and I love telling them just how easy it was to do. Stay tuned for a special discount code just for Rave & Review readers!
The completed project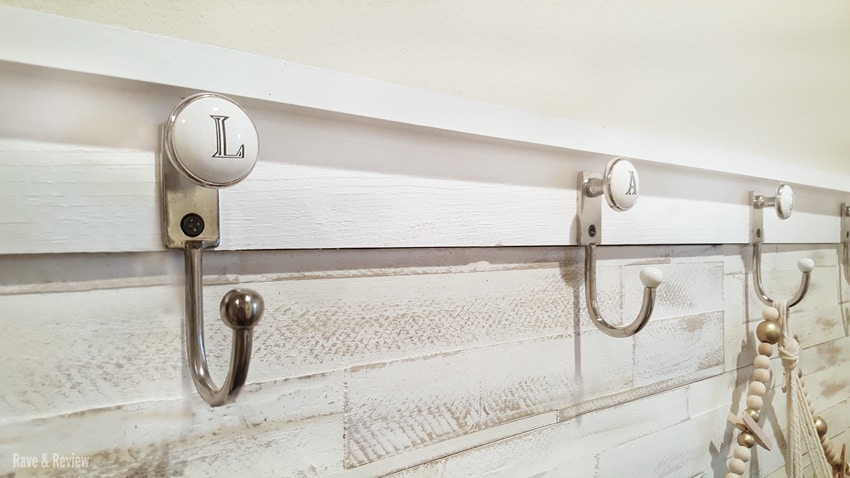
Here are the closeups and before and after pictures of the project so you can see just how big the transformation really was. Not bad for just a few hours of light work, right? Not only is it beautiful, it’s so incredibly practical now that we are bringing home rain soaked coats, umbrellas, and backpacks that we don’t want to hang in the coat closet while dripping wet. Now, we can hang them on the wall until they dry out, which is a whole lot more put together than the “put it wherever” method we had been using. 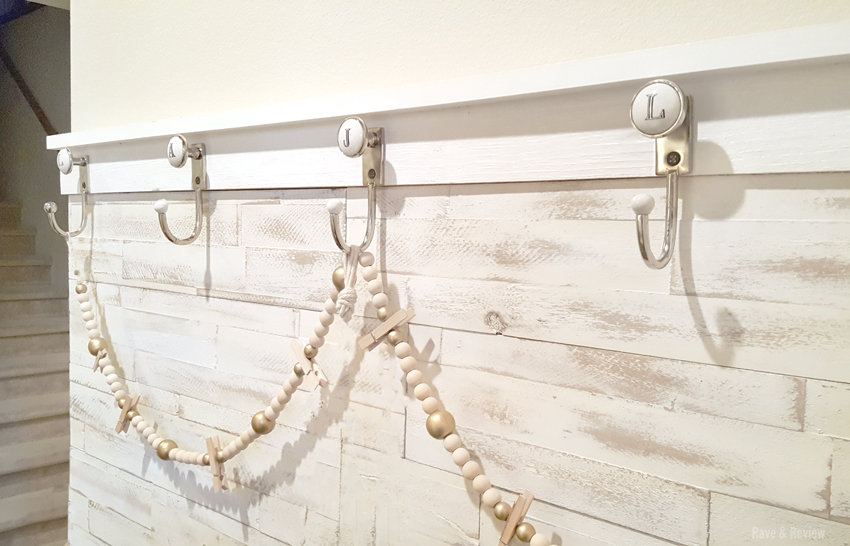
Here is our before and after so you can see how the space was redesigned in one single nap time, using only basic tools that we already had around our home. 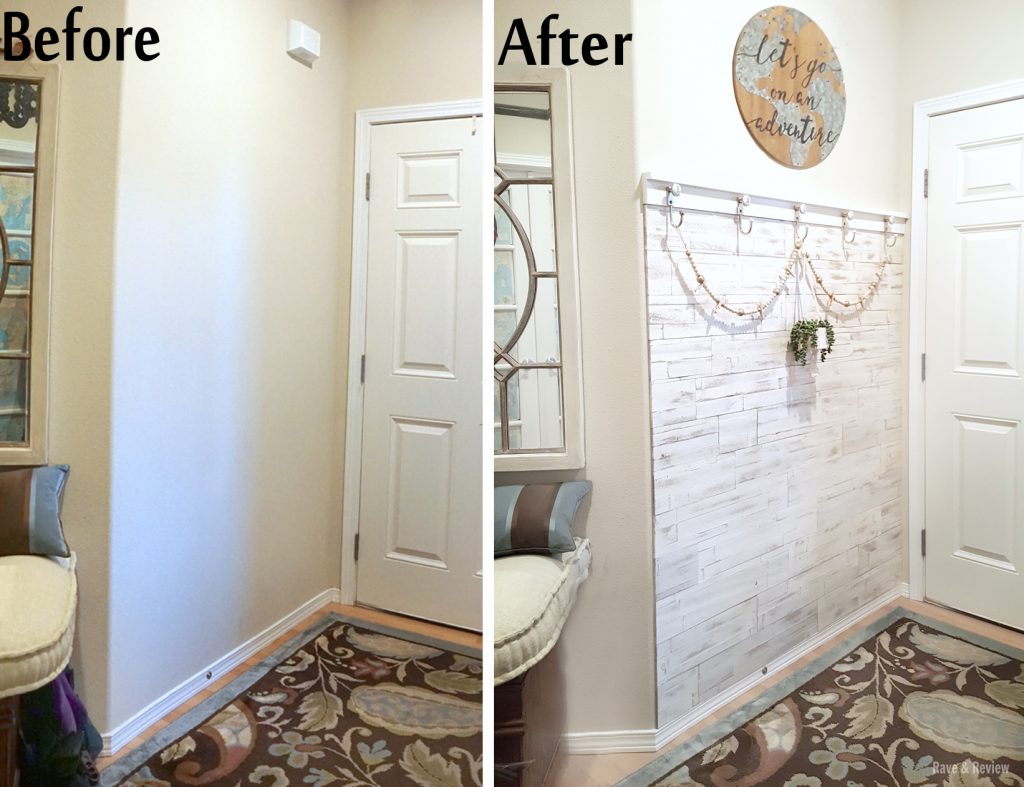 I can’t wait to see everyone’s reaction when we finish our next mywoodwall project: our downstairs bathroom. When it’s finished it’s going to be even bigger and more of a “wow”, and I have big plans to make the whole space amazing.
To buy
You can purchase mywoodwall planks directly from their website.
Awesome!!!!!! What a fantastic find…just bought a home and have some “interesting but ugly” walls to deal with both in the entry (engraved floral pattern) and in the living room a wall is covered with wall size mirrors that we would like to hide…..we have been looking all over the place for solutions!!! This is it!!!!
thanks so much!!!
We had some “interesting but ugly” walls to deal with at both of our last houses, but nothing quite like what you’ve described. Wall sized mirrors sound…. difficult. I have friends that painted a mattee color over some floral engraved wallpaper and the result was AMAZING. Maybe that’s an option? I hope you found some good ideas and I wish I could see your solutions!