Small space gardening made possible with raised beds
A few years ago, hubby and I made the move from a large, hard-to-maintain yard to a smaller, much more manageable patch of dirt for our small family. What I found was that small patch of dirt was a whole heck of a lot more work than I had planned on. First, hubby and I had to agree on a plan (he insisted – I just wanted to wing it) and then we had to provide drainage, bring in more dirt, build a small retaining wall and then a fence. And when that was a completed, he said I could wing it.
There were three things I was adamant about for my newly leveled and semi-privatized patch of dirt: a covered gazebo filled with plush outdoor furniture so I could relax in our backyard without worrying about skin cancer, a bit of grass to roll in and a vegetable garden like my grandparents used to have. The problem with the last part was my grandparent’s vegetable garden was roughly the size of our whole yard once the deck was up and the gazebo was in place. Luckily, I found Gardener’s Supply Grow Beds in time to write one into the design (which we now had now, per hubby’s request).
In spring of 2007 we walked daintily across our newly laid sod and planted our first garden in our Grow Bed. Giddy with excitement, we fitted together the preformed plastic sides and staked them into place in the sunniest part of our yard and filled them with good organic dirt. With the starter plants I had collected in hand, I dug small holes and shoved those sproutings in the soil with nearly no real gardening instruction whatsoever. I completely disregarded the plant packaging that recommended plant spacings of 10-12 inches and tightly packed them wherever my amateur gardener self thought they would fit.
Despite the large number of vegetables we were able to plant in the Grow Bed, we made some rookie mistakes that first Spring. The first was thinking we could plant 2 starter broccoli plants and enjoy fresh heads of broccoli all summer long. It was kind of disappointing that we got exactly 3 heads of broccoli from plants that required 2 1/2 feet of one Grow Bed. Those 2 plants ended up bullying their way around the Grow Bed, shading all the surrounding plants under their huge plume of leaves. If I had done a bit more research into my garden, I probably would have figured out that broccoli harvests are typically done 1 -2 times per growing season and require large amounts of space in order to produce those meager harvests. After digging up the first of the smaller plants that were shaded to the point of death, we splurged and purchased another Grow Bed, which we then filled with the smaller transplants from the first garden along with some strawberries I had my eye on that we couldn’t fit into the first Grow Bed. I ended up with a berry bush and a few vegetables we couldn’t quite squeeze into the garden, so I threw those in the ground right beside the Grow Bed and figured we could use it for comparison purposes.
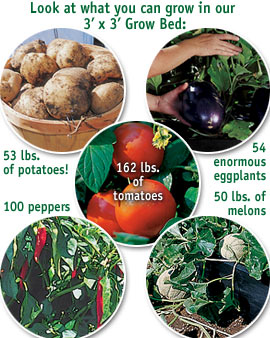
That summer, we diligently weeded our Grow Beds of what could only be called “super weeds” that are bigger in diameter than a quarter and multiply within our small patch of dirt no matter what kind of weed barriers we install. After we finished weeding each week, we would relax and watch our veggies grow from the comfort of the gazebo, amazed by the sheer amount of vegetables we were producing. Pretty quickly, the veggies planted alongside the Grow Beds had reached their harvests end and were withered and dead, but the Grow Bed kept producing. By the end of summer, I was handing out daily fresh produce to my neighbors on both sides, bringing grocery bags full of gourds and lettuce to my father, and begging my cousin to harvest for me while hubby and I backpacked through Europe for a few weeks in August. Even considering the meager broccoli harvest, it wasn’t a bad haul of veggies at all, especially when you consider the entire garden took up a space of 6 ft by 3 ft in our yard. Yes, you read that right, our garden that was churning out veggies faster than you could say “want a gourd?” was only 6 ft by 3 ft. What it lacked in space, it made up for in its…. shall we say overabundance?
 We finished harvesting in mid fall, long after all my friends had given up on their gardens. I largely attribute our long growing season to the fact that the Grow Bed’s black plastic sides help absorb the heat of the sun during the day and the soil in the Grow Beds always seems to be warmer than the surrounding land after the sun goes down. The heat retention in the garden appears to help prolong the harvest into the colder weather; of which I have no hard facts, only squash to prove. A long time ago I heard someone say that planting veggies in junk tires has this same effect, but I’m not sure how reliable the source was. I don’t know about you, but I don’t have a surplus of discarded tires lying about, which I have always been grateful for. It seems to me that if you do happen to have some junk tires and want to try your hand at gardening, that this would be a low-cost and much smaller version of Grow Bed gardening but an excellent way to recycle. However, before you go junk yard diving, you might want to check your facts first – considering even I am questioning the validity of the claim.
Once the first frost came, we essentially abandoned the garden. In fact, we neglected the whole yard, closing the sliding door and going inside for the long winter. The next time I saw those Grow Beds was early spring 2008, when my grand plans demanded a third Grow Bed delivered to my house. The third Bed arrived and we set it up next to the others, noting that the older Grow Beds for the most part still looked as good as the new one, even after sitting outside all year long. After they were all set up, I don’t think anyone would be able to tell you which was the new one of the bunch, which I think speaks to the quality of materials used.
I do have a note of caution when dealing with larger numbers of Grow Beds: have a plan before you set them out and fill them with dirt and veggies. I didn’t have as clear of a plan as I would have liked (I know, I know, I should have listened to hubby…) and I was on a mission to have a completely compact garden, so I shoved all the Grow Beds against our fence without leaving space between them, so they became a large 3 ft x 9 ft rectangle. Which, doesn’t sound like a bad plan until you need to harvest delicate veggies from the middle Grow Bed’s back row and can’t reach. And then you find yourself stepping inside the garden in order to reach all the way to the back, which your husband will undoubtedly scold you for and will probably kill the Swiss Chard under your boot.
Luckily, the beds are fairly easy to slide over a bit once they are done producing – you just pile all the dirt in the Bed in the direction you want to slide the Grow Bed and then you delicately shimmy it into place before you level the soil again. It leaves a little soil where the bed once was, but it’s not too bad at all. Not a good idea for long distances, but it worked to add in the much needed rows between the beds for the third growing season.
The one complaint I do have is that the sides of the Grow Beds are not solid pieces of plastic like the pictures suggest, but rather are only fronted with the smooth plastic and the backside is hollowed out with only a minimal amount of support running through it. The lack of solid plastic sides means that after the Beds are filled with dirt, the weight of the soil causes the sides to bow out slightly. It’s not too noticeable, and it doesn’t seem to affect the usefulness of the Grow Beds, but it’s not as pretty as if the sides were perfectly straight as they are when delivered.
All three Grow Beds have just seen yet another long winter without showing their age and I’m excited to say that I just finished planting our veggies for the third year in a row. This time, we excluded broccoli altogether and made sure there were ample rows between the beds – here’s hoping that those rookie mistakes we’ve made in years’ past are behind us.
If you want to start with a foolproof plan and end up with an even better garden on your first try, you should check out the Gardener’s Supply website where they have a new Garden Planner. I would have paid good money for the first year I planted and I’m guessing hubby would agree. I actually had fun playing with the Planner and plotting out the garden this year. I was really surprised to see that I wasn’t over packing the Grow Beds as everyone had suggested and now I have an official website to back me up, as if my mad gardening skills weren’t enough proof of my green thumb.
http://www.gardeners.com/Kitchen-Garden-Planner/kgp_home,default,pg.html
Specifications from Gardeners.com:
• Earth-friendly, 100% recycled plastic
• All sizes are 10″ H
• Easy assembly
Grow Beds are sold exclusively at www.gardeners.com
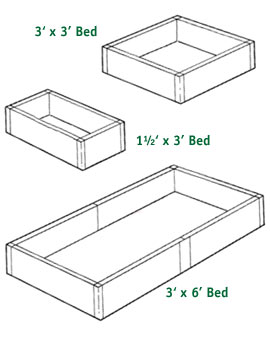
Price: $50 for the 3ft by 3ft size, but there are larger and smaller sizes available. I have heard from friends that the larger size is merely two 3ft by 3ft Beds that have been fitted together and not a solid bed as you might imagine. If that concerns you, you might just want to order the smaller size and plant in rows like I described.
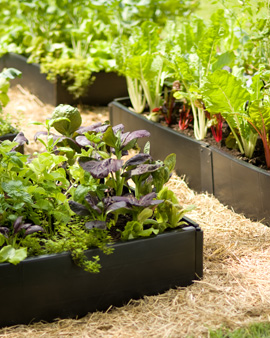
Looks: They actually aren’t that bad looking, even with the slightly bowed sides. I know that black plastic gardens don’t sound attractive (and it really aren’t when compared with copper edged wooden built-in beds), but I was surprised by how nice the beds look when in full production.
Overall: I love my Grow Beds. They may not be exactly like my grandparents’ garden growing up, but they are the more modern, slightly urban, space saving version.


Hey thanks for the review of the grow beds. I’ve been eyeing them for a few years now knowing that raised beds are the way to go. Even though I’m a master gardener, I haven’t even attempted vegetable gardening partly due to illness and also because I know I wouldn’t get any help in doing so. These sound easy enough for one person to put together and deal with. Thanks for your insight and link to their planner.
I wish they still carried these. So cool!