I think I had 5 clips the entire time I was growing up. My daughter has dozens. While they are admittedly adorable, they also drive me crazy when I can’t find the one I’m looking for or when one lands on the floor and gets stepped on.
So, a few years ago we got a single ribbon bow holder, which we love, and it holds many of the bigger bows nicely. But pretty soon we grew out of that one and needed another, so we got a second, which we also love, and then we filled that one up in no time.
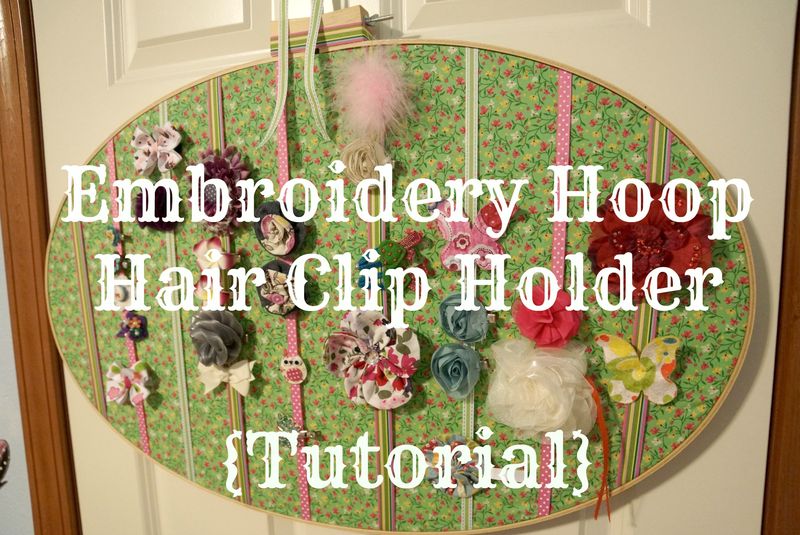
In a cute little boutique near us they had a hair clip display done with ribbons crisscrossing a frame and it was then I decided I would simply make a bow holder myself that could hold more than a dozen clips at a time. But, then I got to brainstorming and that’s when the DIY Embroidery Hoop Hair Clip Holder was born.
Things you will need:
Embroidery hoop, any size
Fabric for backing that can cover your hoop and have a few inches of excess fabric around all the edges
Assorted ribbon
Fabric glue
Hot glue gun
Paint (optional)
Staple gun
I personally love embroidery hoops and have been dying to use one in a project ever since I saw Mandy from The Haps do Harper’s room reveal. I did a little happy dance when I finally figured out how I could use one and where I would put it once it was finished, and then I did another one when our local fabric store had hoops on sale that same week. Fate, I tell you.
I picked the largest one they had, mostly because I’m hoping that I won’t have to make another one in just a few weeks, but you could really do this in any size. It would actually be cute to do a few smaller hoops with different fabrics and ribbons as sort of an art fixture, but I will leave that for when we outgrow this one.
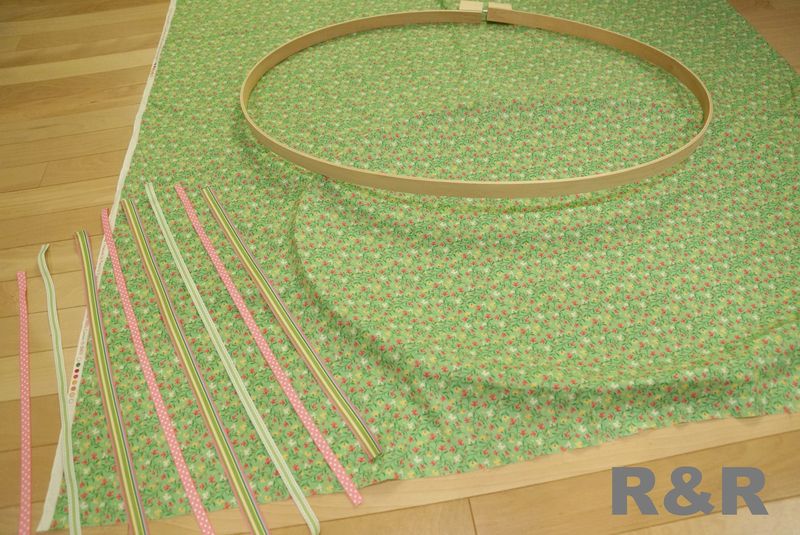
After you have your hoop and supplies, the next step is assembling. But, if you would like to paint your hoop, you should do so now. I obviously skipped this step, but will definitely paint my next one. Instead, I was so excited to get the project going that I just started assembling and then it was too late. Don’t do what I did, kids.
Once your hoop is ready, you simply put your fabric in the embroidery hoop, pulling as taut as possible. I worked at this step for a long time until it was perfectly stretched from every angle, but I’m not convinced it was entirely necessary and in retrospect, ironing would have been faster. But, I would basically do anything to avoid ironing. Clearly.
Once your fabric is taut, you simply trim your fabric around the hoop leaving approximately an inch of fabric. Then you flip your hoop over and line the inside of the hoop with fabric glue or hot glue. This is best to do a few inches at a time as the glue dries fast and it needs to hold tight.
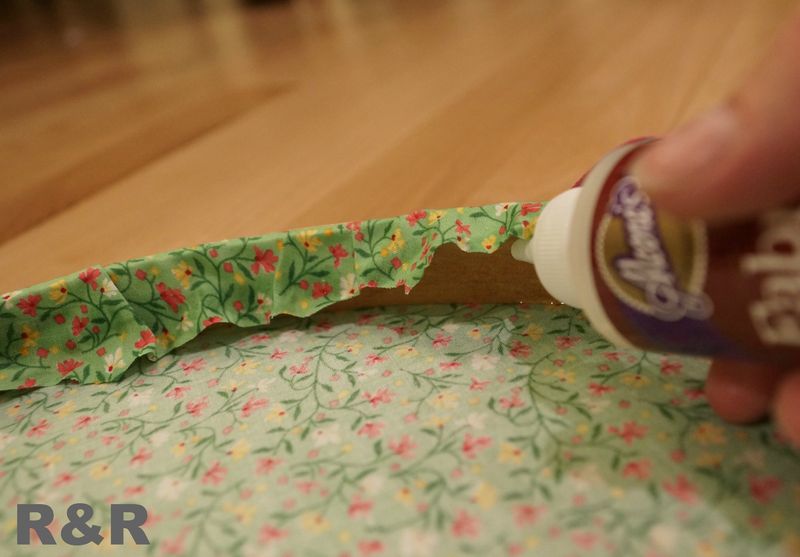
I used fabric glue and found that it worked quite well, but traditionally hot glue would have been used. Whichever method you go with, know that you will get glue on your fingers. In fact, I still have glue on my fingers.
Once the glue dries fully, you can carefully take the outer hoop off and add ribbon. When you are cutting your ribbon, be sure and leave quite a bit overhanging as it will need to wrap around the hoop as well. I decided to place my ribbons randomly over the hoop at different increments so I could accommodate clips of all sizes, but you could always measure if random bothers you. As for me? Random is how I live life.
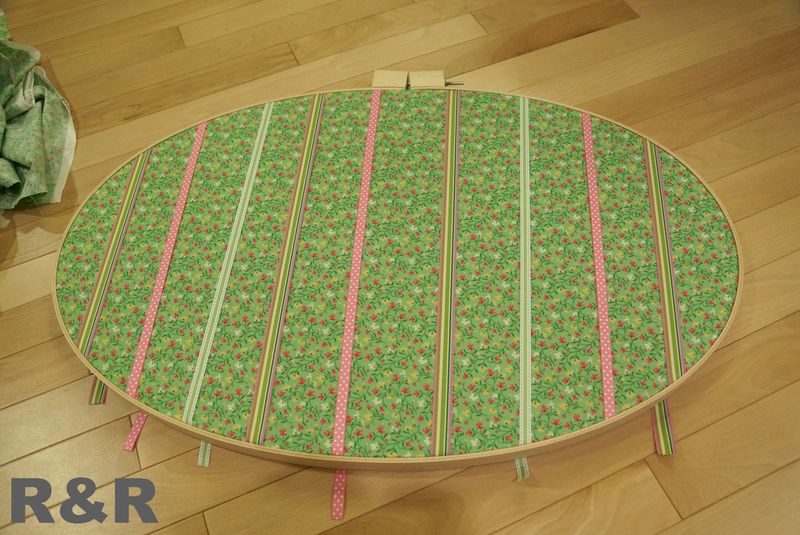
Once you’re happy with placement, you can simply replace the outer hoop and then pull the ribbons taut. I started with my hoop loose for this step and then tightened the screw on the outer hoop to make sure they were as tight as possible and then repulled all of my ribbons again. Once you’re sure they can’t get any tighter, you simply glue the ends of the ribbon to the inside of the hoop as you did the fabric earlier.
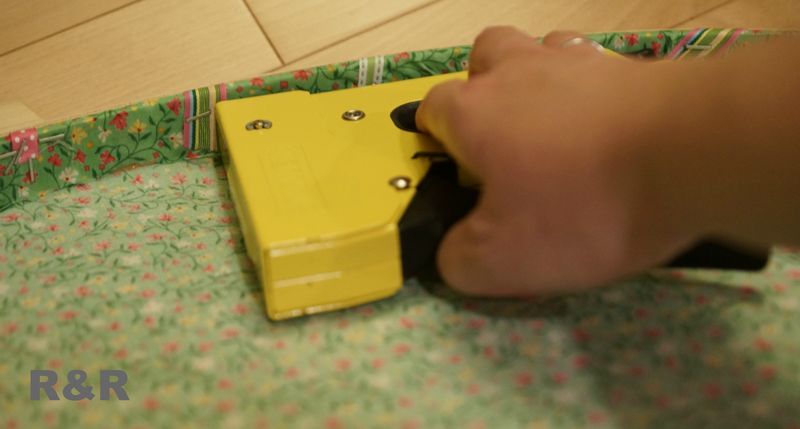 Once my glue was dry I was still nervous it would pull out with even a tiny bit of force, so I convinced hubby to staple the ribbon ends to the hoop from the inside. After that, my project was pretty much done, I just tied a ribbon to the top for color and then I tied a longer string to the inner screw of the hoop for hanging.
The bow clip holder is going on the back of my daughter’s room {yay for unused wall space!} and I didn’t want to put a nail hole in the door, so I used a simple Command Hook and called it good. Since I was putting it on a door, my biggest concern was that the hoop would hit the door each time it was opened or closed, but I’m happy to report that it doesn’t hit at all.
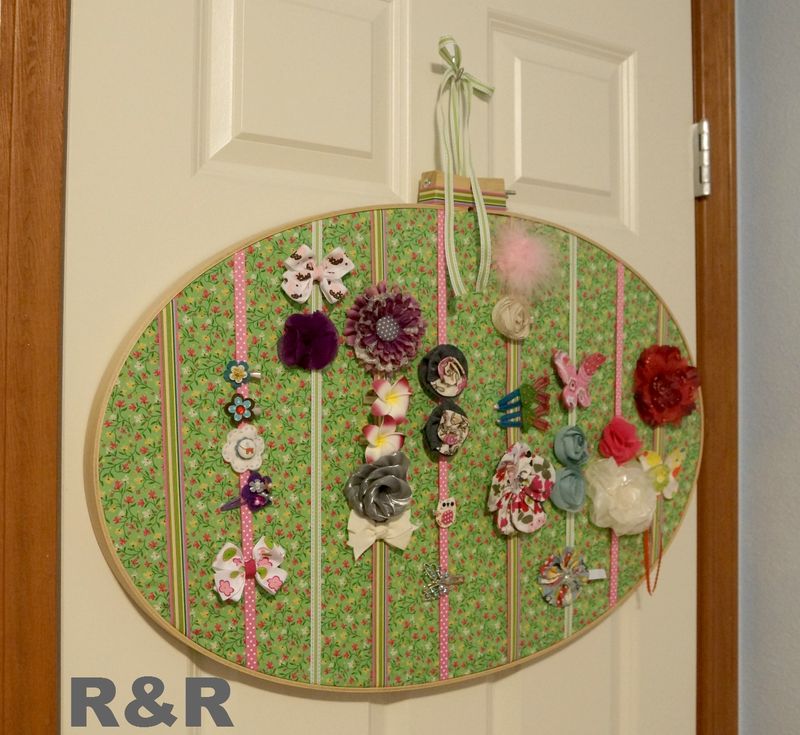
Because it’s hanging pretty loose off the ribbon and because the whole hoop, even full of ribbons, is so incredibly light, it almost catches air as the door is closed and lands without a sound. I was really happy about that because it meant I didn’t have to felt the edges like I thought I would.
I still am working on a few things with my design and figuring out a way to add loops to store headbands underneath the hoop, but overall I'm happy with the hair clip holder and think it adds a bit of fun to an otherwise overlooked area of her room. So, there you have it, a hair bow solution that cost me less than $4 to complete because I already had the fabric, the ribbon, the staples and the glue. Can’t beat that, right?

You are just so darn crafty – cute!
You are the craftiest mama I know! Nice work. We don’t wear hair clips here, but I totally love this idea 🙂
People really love doing DIY project. Embroidery is good and exciting DIY work that can also help you create DIY home decors.